For ASP.NET Core development, we can use various tools. If our working platform is Windows, then we can use the full-featured Visual Studio development environment. If we develop on Mac OS or Linux, then we can use the advanced Visual Studio Code editor. This editor can also work under Windows. This tutorial will primarily use Visual Studio 2019.

So, let’s download the VS 2019 installer and run it. First, we are asked to set a number of options. And since we will be working with ASP.NET Core, then select the ASP.NET and web application development item in the installation program:
Also, when you select this item in the box on the right, you can also select optional components that will be installed with ASP.NET. All components can be selected.
In addition, just below, also in the installer program, we need to select another item Cross-platform development .NET Core:

After checking all the options we need, we will install Visual Studio.
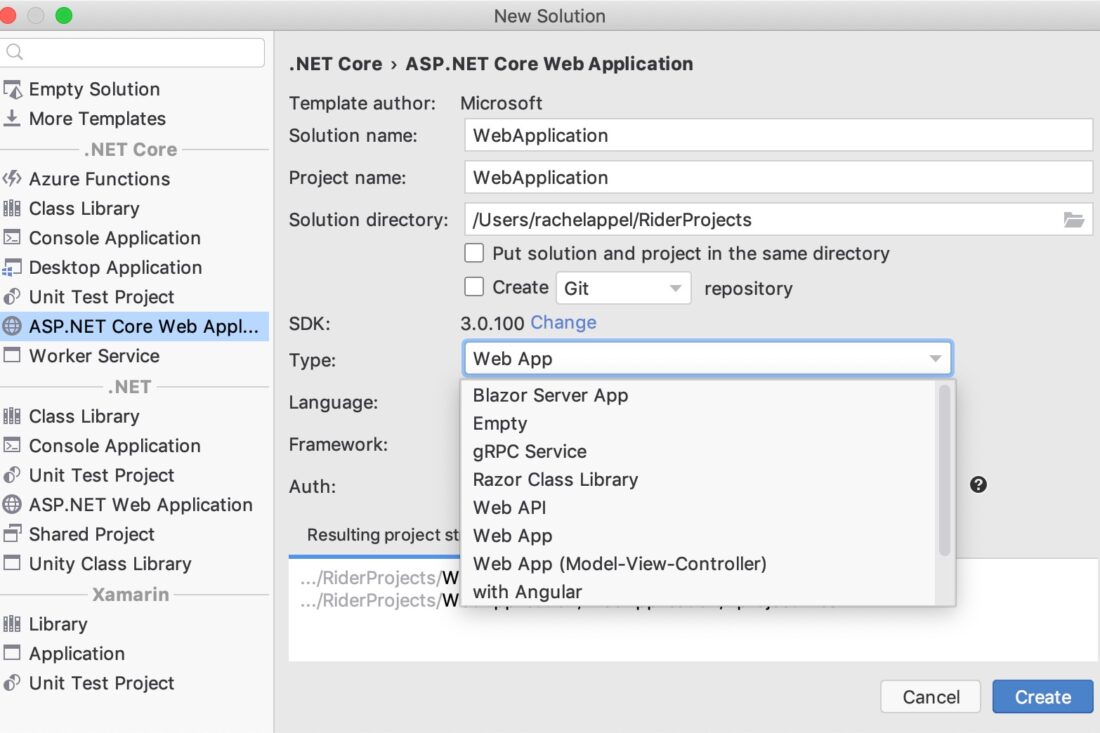
After installation, open Microsoft Visual Studio 2019 and when creating a project, select the ASP.NET Core Web Application item – a project type for creating an ASP.NET Core web application:
In the next step, we will give the project some name, for example, HelloApp, and define a location for it on the hard drive:
After that, a window for selecting a template for a new application will appear:

Several types of projects are available to us here:
- ASP.NET Core Empty: An empty template with the most minimal functionality for building apps from scratch
- ASP.NET Core Web API: A web application project that uses the REST architecture to create a web service
- ASP.NET Core Web App: A project that uses Razor Pages by default to handle requests
- ASP.NET Core Web App (Model-View-Controller): a project that uses the MVC architecture
- ASP.NET Core with Angular: A project specifically designed to work with Angular 2+.
- ASP.NET Core with React.js: a project that uses React.JS
- ASP.NET Core with React.js and Redux: a project that uses React.JS and Redux
In addition, here we can specify the ASP.NET Core version in the drop-down list, but in this case we will leave the default value – ASP.NET Core 5.0.
Also here you can specify the type of authentication that is used by default in the project and connect the Docker container.
There is also a “Configure for HTTPS” checkbox. When this check box is selected, the project will be launched over HTTPS by default during debugging and testing. In this case, setting and unchecking this check box is irrelevant. In addition, even if we set this mark, then later through the project properties, you can cancel the launch via HTTPS or, conversely, reinstall it.
Among these templates, we will select ASP.NET Core Empty, leave all the other values by default and click on the OK button. And Visual Studio creates a new project:

Let’s take a look at the basic structure of a standard ASP.NET Core project. The ASP.NET Core Empty project contains a very simple structure – the minimum required to run the application:
- Dependencies: all packages and libraries added to the project, in other words, dependencies
- Properties: a node that contains some project settings. In particular, the launchSettings.json file describes the project launch settings, for example, the addresses at which the application will be launched.
- Program.cs: the main file of the application, from which its execution begins. The code of this file configures and starts the web host within which the application is deployed.
- Startup.cs: the file that defines the Startup class and which contains the logic for handling incoming requests
